 For most people the joy of pumpkin carving is a treasured childhood memory, but would you believe that not everyone has fulfilled this fun Halloween activity. As we venture into our fourth decade, we realised that there were lots of traditions we were yet to do and so as always, we added them to our bucket list.
As the summer began to fade and we entered into autumn, our minds turned to more activities indoors, so it seemed the perfect time to tick carving pumpkins off our list. Pumpkins with ghoulish faces which are illuminated by candles are the epitome of the Halloween season.
Now we’ve done it we’re eager to pass on our tips and tricks, so that those of you who haven’t carved a pumpkin before can join in the fun. Or you may simply want to up your carving skills which we’re sure we can help you with.
Once you’ve displayed your pumpkin, if you fancy trying something else then we recommend checking out our Autumn Bucket List Ideas and Hobbies Bucket List. Both will provide you with lots of ideas to fill those Fall days, especially as the weather turns a little damp and cooler.
Ad Disclaimer!
This website uses paid adverts and affiliate links, these come at no additional cost to you and help us to fund the operation of the website, meaning we can continue to provide you with valuable content.
The money received from these links and adverts do not influence any recommondations made within our content.
Page Contents
Why we Carve Pumpkins – The Haunted History
Halloween is a tradition which is based on the Celtic festival of Samhain, which marked the end of summer and the beginning of a new year on November 1st.
In the 8th century the Roman Catholic Church moved All Saints Day which celebrated the church’s saints to November 1st. This meant that All Hallow’s Eve or Halloween fell on October 31st. Traditions from Samhain continued and included wearing disguises to hide yourself. This is because it was believed that during Samhain the souls of those who died that year travelled to the underworld and other souls would return to visit their homes, so you needed to find a way to conceal yourself as they wandered around your home.
This is where the Jack-O’-Lantern comes in and its association to the folklore of Stingy Jack, which led to our favourite tradition of carving demonic faces into pumpkins, or turnips. It originates from an Irish myth and according to the story, Stingy Jack invited the Devil to have a drink with him. As you would imagine from his name, he didn’t want to pay for his drink, so instead convinced the Devil to turn himself into a coin that Jack would use to buy their drinks. Once the Devil changed into the coin, Jack decided to keep it and so placed the money into his pocket next to a silver cross which prevented the Devil from reverting back to original form. The Devil was eventually freed by Jack under the condition that he would not bother Jack for one year and should he die, the Devil would not claim his soul.
The following year Jack tricked the Devil again, by persuading him to climb a tree to pick a piece of fruit. When the Devil was up in the tree, Jack carved a sign of the cross into the bark of the tree. This meant that the Devil couldn’t come down until he promised Jack not to bother him for another ten years.
The legend says, soon after Jack died, and God decided he could not allow such a bad person into heaven. In retaliation the Devil who was upset by the trick Jack had played on him, kept his word and did not claim his soul, but also didn’t allow Jack into hell. Jack was sent off into the dark night with only a burning coal to light the way, but he placed the hot coal into a carved-out turnip. He is said to have been roaming the Earth with it ever since, which led to the Irish calling his ghostly figure ‘Jack of the Lantern’ which was shortened to ‘Jack O’Lantern.
As the tradition grew, people in Ireland and Scotland began making versions of Jack’s lantern by carving scary faces into turnips and placing them in windows or near doors. It was hoped that the image would scare away Stingy Jack and other wandering evil spirits.
As immigrants from these countries moved around the world, they took their traditions with them. Hence the Jack O’Lantern being so popular in the United States of America. Pumpkins are a fruit native to America, and it was soon discovered that they made the perfect Jack O’Lanterns, as such they became an integral part of Halloween Festivities.
What do you Need to Carve a Pumpkin
As we mentioned above, this is our first time carving a pumpkin, so we were starting from scratch. You basically need to purchase three things and they are;
- A Pumpkin,
- Pumpkin Carving Kit,
- Stencil for your Pumpkin Pattern.
Picking Your Pumpkin
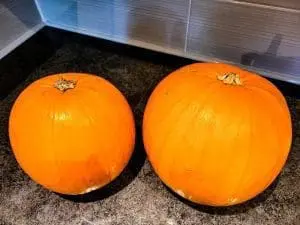 Most people don’t even consider how to pick a pumpkin for carving when they head to the supermarket or farmers field. But choosing the right shape and ensuring you have a healthy pumpkin is important, so that it lasts throughout the Halloween season. So here are our tips on picking a good pumpkin for carving.
- There’s a rule of thumb that says, the darker the colour the better the pumpkin. So, grab a nice round shape which is the right size to fit your template (something we didn’t consider when we picked ours). Ripe pumpkins have smooth, uniformly coloured skin and a vibrant orange colour. Choosing a smooth sided plump one without deep ridges means it is probably well hydrated and as such it will carve easily.
- It is rare to find a perfect all-round pumpkin as they can get damaged when they grow and during transportation. But our advice would be to make sure there are no rotting or soft spots.
- Bear in mind that pumpkins will stop changing colour once they have been picked, so don’t choose a pale shade hoping it will ripen once it’s off the vine.
- Pick one with a firm handle so you can carry it and it’s easier to lift the lid once the pumpkin is carved. Again, we didn’t even consider this so both of our pumpkins just had brown stumps. If you struggle and can only get a handle less pumpkin, then another carving option is to cut the hole at the bottom and instead place your pumpkin over the candle as a light source.
- Preferably choose one with a flat bottom, so it doesn’t wobble once you light the candle inside.
- Tap the pumpkin before buying it. The best option for a pumpkin which you want to carve is that it should make a hollow sound. If when you tap it, you hear a dull thud then that indicates thicker walls meaning there is more flesh. This is ideal if you want to bake pumpkin pies or make soup, but not so much for carving.
Carving Tools – Pumpkin Carving Kit
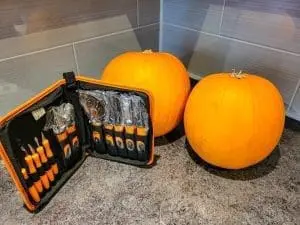 You’ve got your pumpkin and now you need the tools to prep, gut and carve it. Our advice is to leave your kitchen knives in the draw as they can slip causing injury and treat yourself to a specific pumpkin carving kit. How much you spend on it will depend on you, but we decided to go all out and buy this Fenvella Halloween 12-piece Carving Kit. It provides an array of tools and a storage bag so you can keep them safe for many Halloweens to come. It has a pumpkin scooper, small saws, a drill, and etching tools, and we were glad to have paid that little bit more, as it made the whole carving process easy and enjoyable.
There are much cheaper options such as this Buystarget Halloween Pumpkin 5-piece carving set. But you will really feel the change if you upgrade and in all honesty the difference in price really isn’t that big. If you think you’ll carve pumpkins more than once, then we would suggest going for the Fenvella kit.
For those buying another kit other than those we have suggested, make sure it has a scoop to remove the guts and seeds of the pumpkin. But also, a poking tool and small saws with serrated teeth.
Additional Bits Needed
Aswell as your pumpkin and carving kit you will need some Sellotape, a bowl to put the pumpkin guts in, a candle or LED light and matches for when you finish. We’d also recommend kitchen paper and a towel because this is a messy task, but that makes it fun.
Pumpkin Carving Templates or Stickers
The carving template is basically a tool which helps you put the shapes onto your pumpkin. It’s a simple way to guide your carving and allows you to create more intricate styles, without the mistakes that can occur when you freestyle it. You pretty much have two options, printed templates, or stickers which you can wrap around the pumpkin.
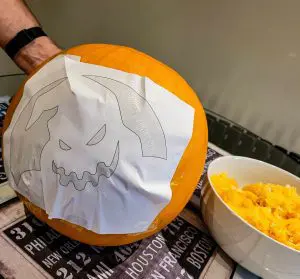 We’ll start with printed templates because it’s the route that we took and found it relatively easy. If you google ‘Pumpkin Templates’ then you’ll find plenty of websites pop up, but we had Zombie Pumpkins recommended to us and so we used them. They provide a raft of printable templates, which can be sectioned by category (for example vintage villains, heroic headliners, and modern monsters), or by difficulty level (beginner, apprentice, enthusiast, veteran, and maniac). You can peruse the different designs but to access and print them you must create an account and become a member. Sadly, this comes at a cost, but in reality, not a big one when you consider what it is you get. There are three levels with Zombie Pumpkin, and they are.
- Skeleton Crew – Costs 5 dollars* – 25 pattern limit with 9-month access.
- Fleshed Out – Costs 10 dollars* – 100 pattern limit with 9-month access.
- Monster VIP – Costs 20 dollars* – unlimited pattern access to all 598 designs, additional VIP patterns and 9 months access.
*Costs shown as they were in October 2023.
Of course, you may find other sites where you can get template patterns completely free, but we loved the designs, so joined Zombie Pumpkins at Skeleton Crew level. Because you only have access for 9 months our advice would be to print up all the 25 designs you want once you’ve registered. We printed 3 or 4 copies of each design so we can use them over the next few years and get the most out of our money. It’s probably an obvious comment to make, but once you add the printed template onto your pumpkin and use it, then it will be destroyed. That’s why it makes sense to print a few of them at the start. We found that 25 designs were more than enough, and we picked from all the difficulty levels so that we can progress to the next one each year. Within your account it will show you how many remaining patterns you have left and when your account expires.
The other option is templates which you stick on the pumpkin, and you can get them in a lot of stores around Halloween. They can be easier for beginners, but they tend to be limited design wise. You can find options on Amazon including this Halloween Pumpkin Face Decal Sticker Template which gives you various disposable noses, eyes, and mouths.
The reason they’re easier is because you can stick them on and smooth them out on the pumpkins skin which is a little harder to do with a printed template on paper. Either option is fine for beginners, we just felt that we wanted to do a design that was a little trickier than what the stickers provided.
Prepping Your Space to Carve
Let’s start by saying that you’re going to make a mess, so you want to find a space where you don’t mind getting pumpkin guts everywhere. We’d recommend sitting at a kitchen table because you need a hard surface and depending on the design, you may be sat there a while poking holes in the skin and carving it out. Towels are ideal for the table and your lap because you may need to place the pumpkin there as you poke out the design. Covering everything will make it easier when you tidy up afterwards and will prevent any damage to your surfaces. You may find that pumpkin guts or the bits you carve out can end up on the floor, so have a clear area where you can easily clean it up.
How to Carve Your Pumpkin
Now you have the tools, templates and carving area prepped, it’s time to begin. Let us guide you through each step of what we did and even the things we did wrong in our first attempt.
Making the Lid
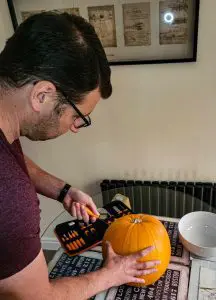 The first step is making the lid to your pumpkin, and you do this by cutting a circular hole on the top around the stem. Now we will admit that our first attempt went a bit wrong, because we made the lid too small. So, a good idea to make sure this doesn’t happen, is to draw a lid on the top so you have a line to cut around. The circle should be about two-thirds the diameter of the pumpkin.
Some people prefer the zig zag lines of traditional pumpkins, but if it’s your first then we recommend you simply do a straight line. To do this you need a sturdy serrated knife, we used the single sided saw from our carving kit. As you cut into the pumpkin skin and flesh you want to angle the knife at a slight inward direction towards the middle. The slanted edge will prevent the lid from falling into the hollowed-out pumpkin.
As we researched the process of carving a pumpkin, we read a great tip and that is to make a unique shape or notch in the line. This is so that when you put the lid back on at the end, you can line it up perfectly in the right spot.
Another error we made on our first pumpkin attempt is the size of the hole in the top. Because our lid was a little too small, it led to the hole being small. This is important because you need to be able to fit your hand into the pumpkin when you carve and more importantly when you place a candle in there.
As you remove the lid you may find some of the pulp hanging from it, if that is the case then simply use your serrated knife to cut it away and throw into a bowl. We have mentioned it above, but some people choose to keep the top of the pumpkin intact and cut a lid at the bottom. Then all you need to do to replace the candle is simply lift the pumpkin up; it’s a great idea and we’ll try it next time.
Scoop Out the Guts of the Pumpkin
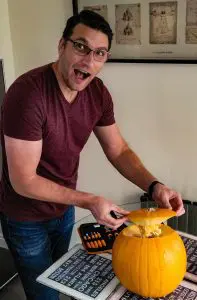 Now to the fun part, removing the guts and pulp from the pumpkin. This is a great time to get kids involved because it doesn’t require any sharp implements and they can get themselves messy. Firstly, get in there with your hands and scoop out the stringy bits and seeds into your bowl. We used the large pumpkin scoop we got with our carving kit, but a big spoon would also work.
Because you’re going to be poking through the flesh and pulp of the pumpkin it needs to be a decent thickness, but also not too thick. We were advised about 1 inch would be enough, so if you think there is too much, then scrape against the wall of the inside of the pumpkin to thin it out. You don’t need to do the entire pumpkin, just the side where you will be carving and the bottom so the candle will sit flat. It’s also a great way to aesthetically clean the inside of the walls, because depending on the template you use, you will see some of the inside of the pumpkin. Just be careful you don’t go too thin.
Transfer the Pattern
The next step is to transfer the pattern onto the pumpkin skin and there are a few ways you can do this. We’ll go through each one, but we thought it was best to start with the one we used.
Poking Holes Transfer Method
This is the more popular method because it’s incredibly simple and helps with those templates which require a lot of detail. Whether you use a stick-on transfer or paper, you’ll follow the same process. It is worth noting here that for those of you who opt for paper templates you will want to cut away any access paper. Grab your tape and then hold it against the pumpkin skin and stick it tightly. You will find that because the pumpkin shape is rounded, there will be parts of the template which fold. The best way to combat this is to cut slits in certain spots to smooth it out. As long as the cut-out sections of the pattern are flat then you should be ok.
Grab the poke or etching tool (or a push pin) from your carving kit and poke holes along the lines of the pattern. If you’re using a Zombie Pumpkin template, then you are looking at carving out any of the dark sections.
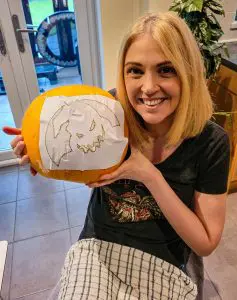 To begin, this should be deep enough to simply pierce the template paper and pumpkin skin. Depending on the design you should make the holes 1/8” to 1/4” apart, but to be honest we simply left a small gap between the previous hole to the next one. We poked the holes just inside the line of the template because you can be left with a ridged edge which you’ll need to smooth and carve away. As you’re doing it you will find the paper template will get wet with pumpkin juice and the poked sections of paper may break off, but as long as you have most of the shape then it shouldn’t be a problem. Some of the paper will also stick in the poked holes but you can either wipe them off or they’ll go when you begin to carve.
When you remove the paper, you’ll see the pattern of dotted lines which you have created. It is this that you will follow to create your carving.
Stick and Carve
If you’re using a stick-on template, then all you have to do is smooth it over the pumpkin skin and then you can either follow the poking method or carve straight into the pattern. Some pumpkin carving enthusiasts will print their templates onto adhesive sheets, but if that all seems too much of a cost then simply follow the paper route which we detailed above.
Transfer Paper
Another option is Saral Transfer Paper which you can purchase from Amazon. It works by placing a piece of transfer paper on the pumpkin skin and then putting the pattern on top securely with tape. You then trace the lines of the design using a pen and once you’re done and you’ve removed the papers, you will have transferred lines which you can follow. We were told that blue or white were the better options to contrast against the orange of the pumpkin. The choice is yours then as to whether you poke holes or just carve straight away.
Carving the Designs into the Pumpkin
Your pattern is transferred, so now is a great time to make sure the thickness of your pumpkin is right. We did this by sticking our carving knife from the kit, into various spots of the design and making sure that the blade went all the way through to the inside. If you cannot see the blade poking through anywhere, then you’ll need to scrape the inside a little more until you do.
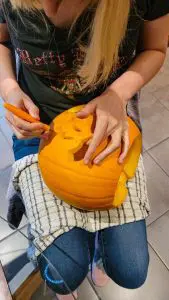 Use the same carving knife to cut through either the template line or connecting the dots if you used the poke hole method. Cut with an up and down motion straight into the centre of the pumpkin, because too much of an angle will make the pieces harder to remove and won’t let in much candlelight.
Some guides recommend that if you’ve used the poke hole option, then once you take away the template, to go over the holes again, but use the poking tool to go all the way through. We did this on our first pumpkin but not the second, mainly because we found that the curvature of the tool left a ridged mark. Even when we carved away at the edge it still left a slight mark, so we found that carving into the skin gave a smoother more professional look.
You’ll probably hold the carving tool as if it were a pencil, but make sure it feels comfortable and sturdy. We had the pumpkin on our lap so that we could manoeuvre it easier. As you cut around the design you may find that you need to work over some areas again, until the pieces you don’t need begin to push out. You can gently use you finger to push the cut-out pieces from the pumpkin but be careful when working on detailed patterns. Some pieces may instead want to push in, so our advice is to remove them in the direction of least resistance. For smaller thin areas we cut out tiny sections, rather than aiming to remove it all in one.
Once all the removable areas are gone then you can use your craft or carving knife to clean up the edges.
Although we haven’t followed the same process, we have read that it’s a good idea to stick to a specific sequence of carving. Working away from the centre is the best option and to start with the small details such as a character’s mouth and teeth. Leave the largest shapes until the end and don’t poke out the cut away pieces right until you’ve finished carving. Removing the pieces will affect the overall stability of the pumpkin, especially if your design is intricate. We simply cut the pieces out and gave the design area more stability using our none carving hand, but this technique makes sense, so we’ll use it in the future.
Pumpkin Carving in Relief
If you want to take it a step further, then you can look at relief carving. This is where instead of cutting holes into the skin you instead remove layers of the skin to create designs. You can either scrape the surface so the light shines through, or you can scrape away all the skin in a circle around your design so that the silhouette creates an image.
Final Steps
Once you’ve completed all these steps, you’ll find yourself with a beautifully designed Jack O’Lantern, which you will be incredibly proud of. There are a few final touches which will give it that professional look.
Water Rinse
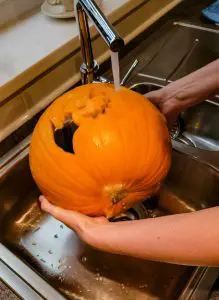 Once carved you will notice there are lots of fleshy bits on the inside and outside of the pumpkin. To help clean it, take your pumpkin over to a sink and let water run through the cut holes. The water will flush out any stray bits of pulp which will help the lines look smoother and clean.
Fine Tuning
As you’re cleaning your pumpkin in the sink, we recommend checking your work by using a light such as the torch on your mobile phone. Turn off the water and place the torch into the pumpkin to see how the design looks. If there are any lines which are crooked or certain lines aren’t letting enough light through, then cut away a little more and rinse again.
Preserving Your Pumpkin
Once you’ve carved the pumpkin and the flesh is exposed to the elements then it will start to decay. The rule of thumb is that a carved pumpkin will typically last anywhere from three to five days, but there are a few tips we can give you which will expand that a little further.
Sealing in Moisture
Because the inside of the pumpkin is exposed to the air, it can shrivel quite quickly. One way to tackle this is by coating the cut edges or any areas where you’ve removed skin, with a thin layer of petroleum jelly (Vaseline) which will seal in the moisture. You can use your finger for larger areas and a cotton swab for smaller tighter spots, but you only need to focus on the cut surfaces.
If the Jack O’Lantern starts to dry out, then rehydrate it by soaking it facedown in cold water for a couple of hours to help it last longer. You can also extend its life by refrigerating it during the day.
Fighting Mold
Sadly, alike any other fruit when it’s rotting, you may find that mould will appear. To help treat mould you can soak the pumpkin in a large container filled with water and some bleach. Half a cup of bleach is more than enough, and you can soak the pumpkin overnight. This helps it by killing off the mould and rehydrating the flesh, so it looks like new.
Lighting Your Pumpkin
 Lighting up your pumpkin is the most exciting part of the whole process, so you will want to make sure you have the best options to help it shine bright. Here are our suggestions.
- Candles – This is the most popular way of lighting up your Jack O’Lantern. We used tea lights but they don’t tend to burn for long, so if you want a little longer then votive candles are a better option. White candles are the most popular and a good choice because they reflect the most light. We used matches to light our candles, but you can burn your hand as you place them into the pumpkin, so a long utility lighter may work better.
- LED Lights – To reduce the risk of fire, LED lights are the ideal option. They are bright and you can mix it up by buying them in varying colours. Another benefit is because they don’t emit as much heat, they won’t cook the inside of the pumpkin and make it shrivel quicker.
Our Thoughts on Pumpkin Carving
We’re a little older than most people to experience our first try at pumpkin carving, but that’s the beauty of bucket lists, you get to try fun activities at any age. The best part is we absolutely loved it!
It’s not just the messy bit that’s fun, we really enjoyed poking the holes into the template and carving the pieces out. It felt incredibly relaxing and something we knew we’d like to do more than once. Yes, there’s a strong likelihood we’ll be heading out to buy more pumpkins and we’re eager to attempt more difficult designs.
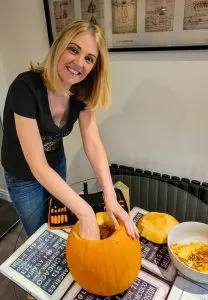 The reality is that carving pumpkins is a simple bucket list idea, but to make it even easier we would recommend having the right equipment. We could easily have bought a cheap carving kit, but decided to go for a more expensive one and we’re glad we did. It gave us everything we needed to carve and shape our designs, plus you could feel the quality in the tools. We’re also pleased we listened to a friend and paid for the templates because we ended up with enough to last us a few years and some impressive designs. As we mentioned above, we have printed a stockpile and placed them away in a folder. Having opted for designs from various difficulty levels, we know that we can work our way up as we practice more and more.
If you’ve never carved your own Jack O’Lantern before then why not add it to your bucket list? In reality this is a cheap item to complete but it’s a fun activity and you then have the joy of lighting a candle and watching your design shine brightly in the dark.
If you add any pictures of your completed Jack O’Lanterns to Instagram, then please tag us in. As you can guess we have become a little nutty about them, so we’re excited to see what designs our readers have accomplished.